


Table of Contents
ToggleLantern pendant fixtures bring an unmistakable architectural presence to a room, part functional light source, part statement piece. They’ve been showing up in entryways, over kitchen islands, and in dining rooms for good reason: they combine the vertical drama of a chandelier with the clean lines of a pendant. Whether you’re working with a colonial revival, a modern farmhouse, or something in between, there’s a lantern style that fits. This guide walks through what makes these fixtures work, how to choose the right one, and what you need to know before installing.
Key Takeaways
- Lantern pendant lighting fixtures combine vertical drama with clean lines, making them versatile for colonial, farmhouse, and modern home styles.
- Choose lantern pendant sizes using a simple formula: for foyers, add room length and width in feet, then convert to inches; for islands, use one-third of the island length as your fixture width.
- Install lantern pendants 30–36 inches above kitchen countertops and 30–34 inches above dining tables to provide task lighting while maintaining clear sightlines.
- Modern lantern designs feature geometric frames and mixed materials like steel with wood or brass with frosted acrylic, while traditional styles showcase ornate metalwork and aged finishes.
- Always verify your ceiling box is rated for the fixture’s weight (typically 8–25 pounds) and securely fastened to a ceiling joist before hanging.
- For dimmer compatibility and flicker-free operation, use trailing-edge (ELV) dimmers with LED bulbs and confirm both the bulb and fixture driver are dimmer-rated.
What Are Lantern Pendant Lighting Fixtures?
A lantern pendant is a suspended light fixture enclosed by a frame, usually metal, wood, or composite, with glass or open panels. The frame gives it a three-dimensional structure, distinguishing it from flat or shade-based pendants. Think of it as a miniaturized streetlamp brought indoors.
Most lantern pendants hang from a chain, rod, or cord connected to a ceiling junction box. They’re hardwired (not plug-in), so installation requires basic electrical work. The frame typically encloses one to four bulbs (E26 medium base sockets are standard), and many newer models accommodate LED bulbs or integrated LED arrays.
The glass panels can be clear, seeded, frosted, or textured. Clear glass shows the bulb and maximizes light output: seeded or frosted glass diffuses glare and hides the bulb filament. Some designs leave the sides open (cage-style), which works well in high-ceiling spaces where you want maximum light spread.
Lantern pendants range from 12 inches to over 36 inches in height, with widths from 8 to 20+ inches. Larger fixtures suit two-story foyers or over kitchen islands: smaller versions work in hallways, breakfast nooks, or clustered in multiples.
Popular Styles of Lantern Pendant Lights for Every Home
Traditional and Vintage Lantern Pendants
Traditional lanterns pull from 18th- and 19th-century designs: curved or tapered frames, ornate metalwork, and materials like aged brass, oil-rubbed bronze, or wrought iron. Many feature beveled or rippled glass, which adds texture and softens light. These fixtures pair naturally with Colonial, Georgian, or Federal-style homes.
Vintage farmhouse styles lean toward simpler silhouettes with matte black or galvanized finishes. Think flat-sided frames, Edison-style bulbs on display, and minimal ornamentation. They overlap with industrial aesthetics, making them versatile in kitchens with shaker cabinetry or dining rooms with reclaimed wood tables. Homeowners drawn to vintage farmhouse lighting often appreciate the blend of utility and charm these fixtures provide.
For rustic interiors, look for lanterns with wood accents, rope detailing, or distressed metal finishes. These work especially well in cabins, lodges, or homes with exposed beams. The mix of materials, say, weathered oak with matte black steel, creates warmth without sacrificing structure. Spaces featuring rustic lanterns often balance raw textures with clean lines.
Modern and Contemporary Lantern Designs
Modern lanterns strip away ornamentation. Expect geometric frames, hexagons, rectangles, or clean cylinders, in finishes like brushed nickel, polished chrome, satin brass, or matte black. Glass panels are often frameless or minimal, and many designs use clear or lightly smoked glass to keep the look uncluttered.
Contemporary lanterns incorporate mixed materials: steel with wood, brass with frosted acrylic, or blackened iron with seeded glass. They’re less about historical reference and more about proportion and contrast. These fixtures fit well in open-concept homes, modern kitchens, and spaces where you want the light to anchor the design without competing with other elements.
Some modern designs feature adjustable height rods rather than chain, allowing for precise placement over counters or tables. Others include dimmable LED strips integrated into the frame, eliminating the need for visible bulbs altogether.
Where to Install Lantern Pendant Fixtures for Maximum Impact
Entryways and foyers are the most common placement. A lantern pendant hung in a two-story entry provides vertical scale and makes a strong first impression. For standard 8-foot ceilings, aim for the bottom of the fixture to hang 7 feet above the floor. In two-story foyers, hang it so the bottom is roughly centered in the vertical space, often 6 to 8 feet below the ceiling.
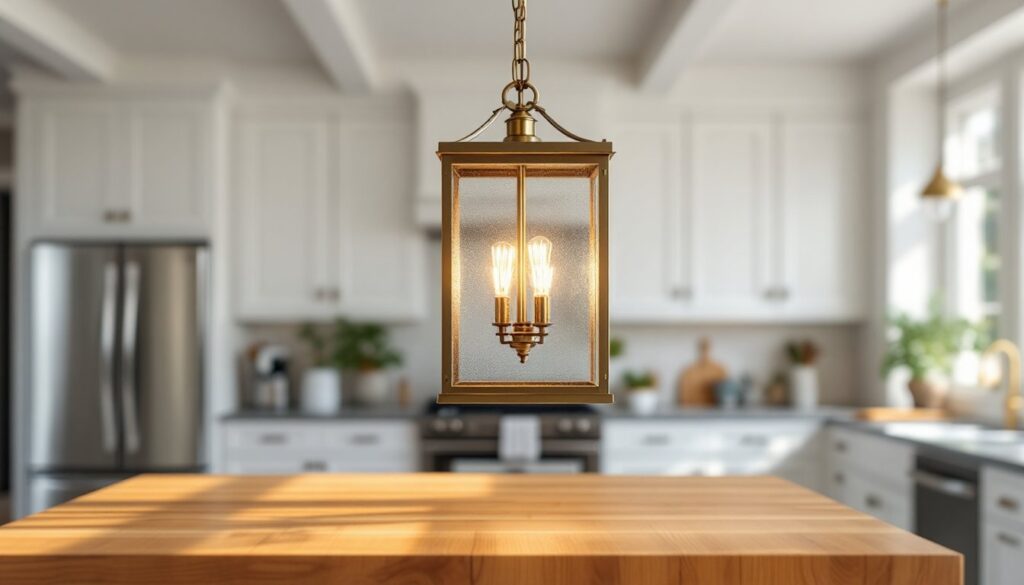
Kitchen islands are another prime spot, especially for multiple smaller lanterns or one large statement piece. Space fixtures 30 to 36 inches apart (center to center) if using multiples, and hang them so the bottom clears the countertop by 30 to 36 inches. This keeps light focused on the work surface without blocking sightlines.
Dining rooms benefit from a single large lantern or a pair of smaller ones over a rectangular table. The fixture should be roughly one-half to two-thirds the width of the table, and the bottom should hang 30 to 34 inches above the tabletop. This range provides even illumination for meals while preventing glare for seated guests.
Hallways, mudrooms, and covered porches are often overlooked. A lantern pendant scaled to the space, typically 10 to 14 inches wide, adds functional light and visual interest. For exterior installations, verify the fixture is wet-rated (not just damp-rated) if exposed to direct rain. Check the manufacturer’s IP rating (Ingress Protection) or UL listing.
Avoid placing lantern pendants in low-traffic corners or over furniture you move frequently. They work best in defined zones where the light serves a purpose beyond decoration.
How to Choose the Right Lantern Pendant for Your Space
Start with scale. A fixture that’s too small disappears: too large and it overwhelms. For foyers, add the room’s length and width (in feet), then convert that sum to inches, that’s a good starting diameter or width. Example: a 10-foot by 12-foot foyer = 22 inches wide. For kitchen islands, use one-third the island length as a guideline for total fixture width (or combined width if clustering multiples).
Ceiling height dictates hanging length. Standard 8- to 9-foot ceilings accommodate most pendants with 12- to 18-inch drop rods or chain. For 10-foot or higher ceilings, consider fixtures with 24- to 36-inch heights or adjustable rods. Two-story spaces can handle fixtures 30 inches tall or more.
Finish coordination matters more than exact matching. If you have brushed nickel cabinet hardware, a lantern in satin nickel or polished chrome reads as intentional. Mixing metals, say, aged brass pendants with black cabinet pulls, works if there’s a unifying element like wood tone or tile color. Designers at Architectural Digest often recommend picking one dominant metal and one accent metal per room.
Light output depends on bulb choice and glass type. A 60-watt-equivalent LED (roughly 800 lumens) is typical per socket. For task lighting (kitchens, desks), aim for 3,000 to 4,000 lumens total. Ambient or accent lighting needs less, 1,500 to 2,500 lumens. Clear glass provides maximum brightness: frosted or seeded glass reduces output by 10 to 20 percent.
Dimmer compatibility isn’t automatic with LED bulbs. Check that both the bulb and the fixture’s driver (if integrated LED) are dimmer-rated. Use a trailing-edge (ELV) dimmer for LEDs, not an old incandescent-style leading-edge dimmer, to avoid flickering.
For fixtures that double as design focal points, review inspiration galleries on platforms like Houzz to compare real-world installations before purchasing.
Installing Lantern Pendant Lighting: DIY Tips and Considerations
Safety first: Turn off power at the breaker, not just the wall switch. Use a non-contact voltage tester to confirm the circuit is dead before touching any wires. Wear safety glasses when working overhead.
Most lantern pendants weigh 8 to 25 pounds. Standard ceiling boxes rated for 50 pounds handle this fine, but verify the box is securely fastened to a ceiling joist or blocking. If the existing box is a lightweight plastic “old-work” style, replace it with a metal pancake box or a fan-rated box anchored to solid framing.
Wiring is straightforward: match black (hot) to black, white (neutral) to white, and green or bare copper (ground) to the fixture’s ground wire or screw. Use twist-on wire connectors (wire nuts) sized for 12- or 14-gauge wire, and wrap the base with electrical tape for extra security.
Height adjustment is done via chain or rod length. Most fixtures ship with 4 to 6 feet of chain and extra wire. Cut excess chain with bolt cutters or heavy lineman’s pliers, leaving a few extra links in case you want to lower it later. For rod-hung fixtures, you may need to order additional downrod sections from the manufacturer.
Leveling matters. If the ceiling box is slightly off-plumb, loosen the mounting bracket screws slightly and rotate the canopy until the fixture hangs straight. Tighten once aligned. Use a bubble level or plumb bob if you’re particular.
When to call a pro: If there’s no existing ceiling box, you’ll need to cut drywall, run cable from a power source, and install a new box, this often requires working in an attic or between floors. If you’re uncomfortable with electrical work, or if you’re adding a new circuit (especially in a kitchen where GFCI or AFCI protection may be required per NEC 2023), hire a licensed electrician. Permit requirements vary, but many jurisdictions require permits for new circuits or changes to kitchen/bathroom lighting. Check with your local building department.
Bulb selection: Match the base type (usually E26 medium base) and don’t exceed the fixture’s maximum wattage rating (often 60W per socket for incandescent, but LED equivalents are fine). For fixtures compatible with advanced lighting systems, options from brands like Visual Comfort Lighting often integrate with smart home platforms.
Final check: After installation, restore power and test the fixture. Check for flicker (a sign of loose connections or incompatible dimmer), and verify all bulbs light. If the fixture feels warm to the touch after an hour, confirm you’re not exceeding wattage limits.